Context-Aware Conversations
nlux allows users to provide context to your AI system based on information available
in the application. This is done though:
createAiContext()- To create React context to wrap the part of your application where you want to provide context.useAiContext()/useAiTask()- Hooks to sync the context with the backend.
Example
The following is a screenshot of a demo application that uses context-aware conversations:
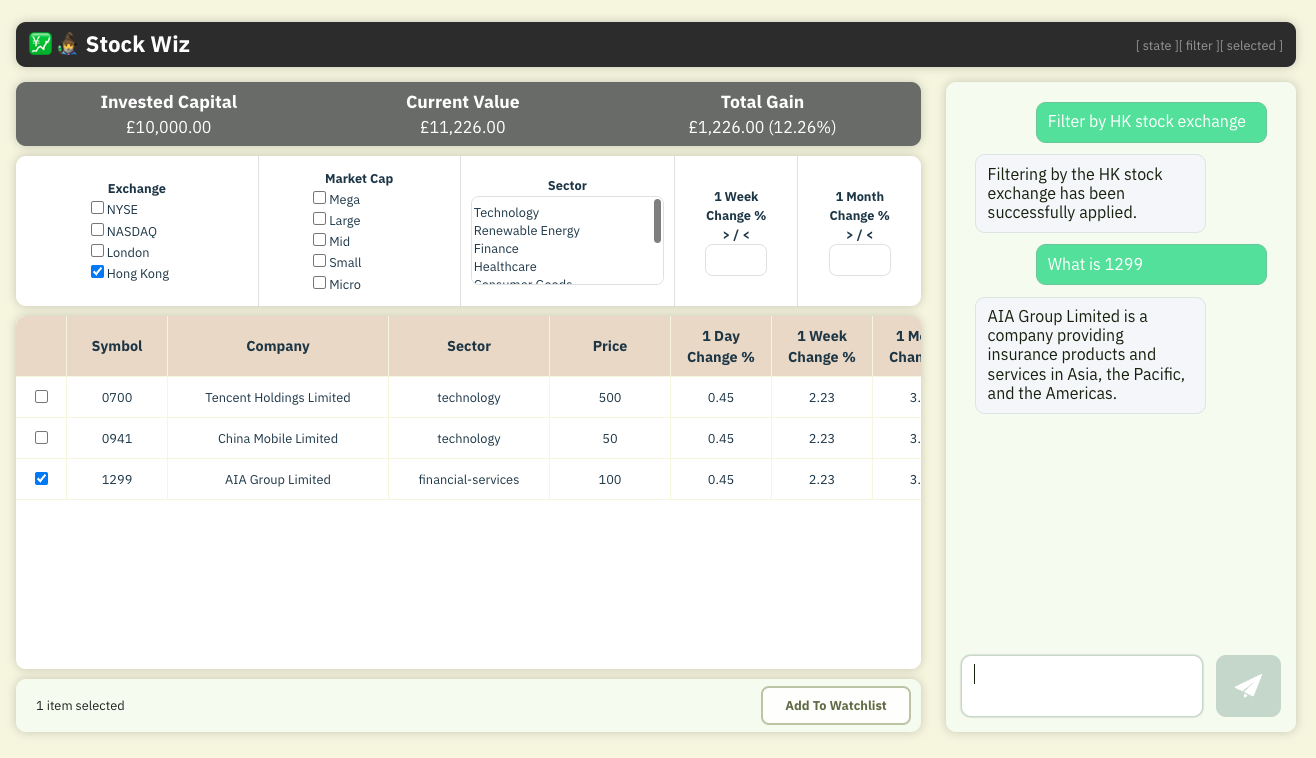
Here is what makes the demo application context-aware:
- When the user types
Filter by HK stock exchange, a filter for the Hong Kong stock exchange was applied: The AI chatbot understood the request and triggered the filter. - When the user asked the generic question
What is 1299 ?, the application provided an answer specific to what the user is seeing on their screen.
If the user changes the page, or the context changes, the AI system will be aware of the change and will keep providing relevant responses.
How It Works
- The user registers relevant context items with
useAiContext()— They will automatically be sent to the AI system when the context changes, and cleared when related components are unmounted. - The user registers relevant tasks to trigger by AI using
useAiTask(). - The
<AiChat />component is configured to use the@nlux/nlbridge-reactadapter, which is a chat adapter that can also handle context-aware conversations and tasks.
In addition to the frontend context tracking, you will need a middleware to track context and provide it to the AI system or LLM that you are using.
In the case of this demo, it's done through
@nlbridge/express, a Node.js library which enables context tracking. You
can also implement easily implement your own middleware to track context and use it with the nlux UI via adapters.
Run The Demo
You can download the code for the demo application and run it on your local machine.
The code is available at the following GitHub repository:
Here is a step-by-step guide to run the demo application locally:
1. Clone the repository:
Clone the nluxai/demos repository to your local machine and navigate to the
stock-wiz-ai directory:
git clone git@github.com:nluxai/demos.git nlux-demos
cd nlux-demos/stock-wiz/stock-wiz-ai/
2. Install the dependencies:
npm install
3. Get the OpenAI API key:
- If you don't have an account, go to the OpenAI signup page and create an account.
- Go to the API keys page
- Click the
Creat new secret keybutton
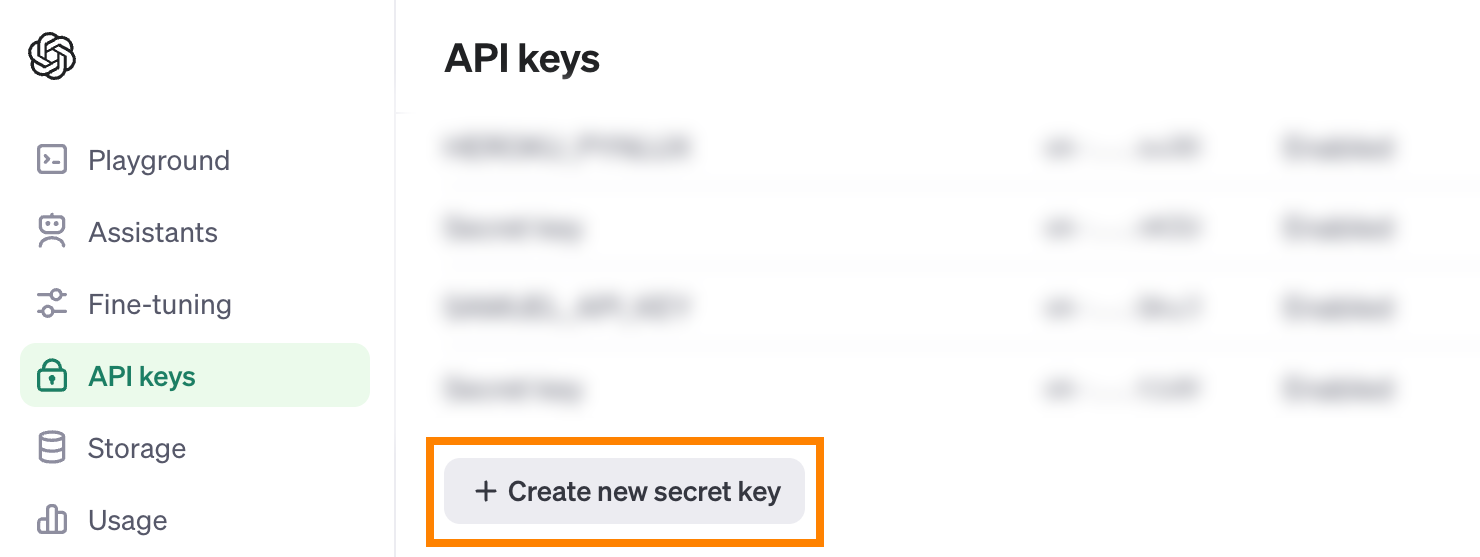
- Give your API key a name and click
Create secret key - Copy the API key and save it in a safe place. You will need it in the next step.
4. Run the demo middleware:
Assuming that your have your OpenAI API key in the environment variable OPENAI_API_KEY, you can run the following command:
npx @nlbridge/server --api openai --port 8899
If you don't have the OPENAI_API_KEY environment variable set, you can use the --api-key flag to set the OpenAI API key in the command line:
npx @nlbridge/server --api openai --port 8899 --api-key YOUR_API_KEY
5. Run the demo application:
npm run dev
Once the application is running, open your browser and navigate the URL displayed in the terminal.